Installing flask-mysqldb (Debug and Solution)

In this post, I will go through how I was able to install flask-mysqldb after going through lots of trial and error. I wanted to install flask-mysqldb to connect the Flask API to the MySQL database we were planning on using.

To install flask-mysqldb, the command to run is:

pip install flask_mysqldb

Yet, when I ran it, I kept receiving these errors:

jessicapeng@Jessicas-MacBook-Pro-2 ~ % pip install flask_mysqldb
Collecting flask_mysqldb
  Using cached Flask-MySQLdb-0.2.0.tar.gz (2.1 kB)
Collecting Flask>=0.10
  Using cached Flask-1.1.2-py2.py3-none-any.whl (94 kB)
Collecting mysqlclient
  Using cached mysqlclient-1.4.6.tar.gz (85 kB)
    ERROR: Command errored out with exit status 1:
     command: /System/Library/Frameworks/Python.framework/Versions/2.7/Resources/Python.app/Contents/MacOS/Python -c 'import sys, setuptools, tokenize; sys.argv[0] = '"'"'/private/var/folders/__/j8b0d7wn7_796hd4c4x56f040000gn/T/pip-install-rCiijx/mysqlclient/setup.py'"'"'; __file__='"'"'/private/var/folders/__/j8b0d7wn7_796hd4c4x56f040000gn/T/pip-install-rCiijx/mysqlclient/setup.py'"'"';f=getattr(tokenize, '"'"'open'"'"', open)(__file__);code=f.read().replace('"'"'\r\n'"'"', '"'"'\n'"'"');f.close();exec(compile(code, __file__, '"'"'exec'"'"'))' egg_info --egg-base /private/var/folders/__/j8b0d7wn7_796hd4c4x56f040000gn/T/pip-pip-egg-info-0D9Xsz
         cwd: /private/var/folders/__/j8b0d7wn7_796hd4c4x56f040000gn/T/pip-install-rCiijx/mysqlclient/
    Complete output (12 lines):
    sh: mysql_config: command not found
    sh: mariadb_config: command not found
    sh: mysql_config: command not found
    Traceback (most recent call last):
      File "<string>", line 1, in <module>
      File "/private/var/folders/__/j8b0d7wn7_796hd4c4x56f040000gn/T/pip-install-rCiijx/mysqlclient/setup.py", line 16, in <module>
        metadata, options = get_config()
      File "setup_posix.py", line 61, in get_config
        libs = mysql_config("libs")
      File "setup_posix.py", line 29, in mysql_config
        raise EnvironmentError("%s not found" % (_mysql_config_path,))
    EnvironmentError: mysql_config not found
    ----------------------------------------
ERROR: Command errored out with exit status 1: python setup.py egg_info Check the logs for full command output.

In the error, it indicated that  mysql_config: command not found so I found this thread referring to it in my search: https://stackoverflow.com/questions/7475223/mysql-config-not-found-when-installing-mysqldb-python-interface

In the thread, it mentions to use  apt-get but I had trouble running this command in terminal, and I learned that  apt-get is only for debian and ubuntu, whereas yum is for centos/fedora/redhat distribution. I decided to use brew which is a 3rd party community doing unix-like things on macOS.

When I attempted to install with brew using this command:

brew install mysql-client

I received these errors:

mysql-client is keg-only, which means it was not symlinked into /usr/local,
because it conflicts with mysql (which contains client libraries).If you need to have mysql-client first in your PATH run:
  echo 'export PATH="/usr/local/opt/mysql-client/bin:$PATH"' >> ~/.zshrcFor compilers to find mysql-client you may need to set:
  export LDFLAGS="-L/usr/local/opt/mysql-client/lib"
  export CPPFLAGS="-I/usr/local/opt/mysql-client/include"

Which essentially tells me to put it into my .zshrc folder. That is done through this command:

echo 'export PATH="/usr/local/opt/mysql-client/bin:$PATH"' >> ~/.zshrc

This briefly translates to:

“Please update my STARTUP config, and when I start a new terminal, in that terminal, update my PATH”

Note: Just editing .zhrc does not affect current window

Afterwards, a new terminal must be opened (my previous mistake with checking in the same terminal window and being confused that no path had been added) in order to check the path with:

echo $PATH

I was able to see the path added after:

(base) jessicapeng@Jessicas-MacBook-Pro ~ % echo $PATH
/usr/local/opt/mysql-client/bin:/Users/jessicapeng/opt/anaconda3/bin:/Users/jessicapeng/opt/anaconda3/condabin:/Library/Frameworks/Python.framework/Versions/3.8/bin:/usr/local/bin:/usr/bin:/bin:/usr/sbin:/sbin:/usr/local/go/bin

Afterwards, when I tried to install flask-mysqldb with the command:

pip install flask-mysqldb

It worked and installed flask-mysqldb successfully! Afterwards, I was able to run the flask program I had built!

This took me hours of stack overflow,  so hopefully it’s helpful for those who have run into the same problem with installing flask-mysqldb!


Github SSH Key

Recently, I tried to clone a repository I was working on in GitHub that I had created, but I received the following error:

Permission denied (publickey).
fatal: Could not read from remote repository.Please make sure you have the correct access rights
and the repository exists.

Apparently, I needed to create an SSH key and add it to Github SSH Keys in order to access the repository. To do this, I followed these instructions (on https://github.com/facebookresearch/deepmask/issues/23):

Generate SSH key using ssh-keygen -t rsa -b 4096 -C "[email protected]".
Copy the output of cat id_rsa.pub
Paste the above copied output into your Github profile -> Settings -> SSH and GPG Keys -> Add new SSH key

Regarding this, I created an SSH key, but couldn’t find it, so I ended up following the path: /Users/jessicapeng/.ssh/id_rsa.pub and I ran command cat .ssh/id_rsa.pub once I was in the directory jessicapeng in order to get it. Then, I followed the instructions and went to my Github Profile > Settings> SSH and GPG Key > Add SSH Key. And afterwards, I was able to successfully clone it and use git with it!

iPv6

Course: https://www.internetsociety.org/tutorials/introduction-to-ipv6/module-1-introduction/

Module 1: Introduction to iPv6

  • IETF = Internet Engineering Task Force (IETF)
  • Problems addressed when transitioning to iPv6:
    • iPv4 address exhaustion
    • need for simpler auto-configuration and re-numbering
    • requirement for security at IP level
    • improved protocol design
    • new possibilities of managing flow
  • iPv4 only has 2 billion IP addresses available, iPv6 encompasses 340 trillion trillion trillion
  • Since iPv6 is a huge amount to address space, the subnet sizes are huge as well
    • At ISP level (/32), there are 79 septillion addresses assigned
    • Largest block of iPv6 addresses allocated to France Telecom and Deutsche Telekom > allocation is /19 block, equivalent to 35, 000 billion
  • Most of the internet becoming dual stack because iPv4 and iPv6 are not compatible
  • Difficulty and cost of obtaining iPv4 address space will increase, inevitable that in the future some sites will only support iPv6
  • Workarounds: Network Address Translation
  • Adopting MAT technology will help systems maintain iPv4 service while moving to iPv6 (bust costly in long-term)
  • Steps to move to iPv6:
    • Learn more about iPv6
    • Get network iPv6 ready

Module 2: Understanding iPv6 Addresses

  • iPv6 addresses are 128 bits
    • broken into sixteen 8 bit sections
    • example of address: 128.91.45.157.220.40.0.0.0.252.87.212.200.32.255
    • can be converted to hex
  • To convert iPv6 from binary address to hexadecimal:
    • Break binary into 8 blocks of 16 bits
    • Split each block of 16 bits into 4 segments
    • Convert each segment into a hexadecimal (0-F)
  • zero compression – consecutive blocks of zeros
    • if there is more than 1 consecutive block where characters are all zeroes, you can compress to ::
    • zero compression can only be used ONCE in an address
  • zero suppression – leading 0’s
    • remove all leading 0s (front part) in each segment (cannot remove if after a non-zero in a segment)
    • each segment must contains at least a single digit if not using zero compression
  • iPv6 prefixes
    • iPv6 is hierarchical, addresses can be sub-netted for performance and security reasons in the same way as iPv4
    • all devices whose IP addresses have the same prefix share the same network component of address and are part of a subnet
    • larger subnet = smaller # after dash
      • /32 subnet (means network is only 32 bits, whereas subnet contains up to 96 bits left for specific addresses)
      • /48 subnet has 80 bits left for specific addresses
      • /32 is a bigger subnet than /48
    • iPv6 address types
      • iPv6 addresses identify an interface/group of interfaces
      • 3 main types of iPv6 addresses:
        • Unicast (2000::)
          • Most common type of iPv6
          • Identifies a single interface
          • Communication between single sender and single receiver over network
          • Every machine should have at least open global unicast address assigned to each interface
          • Global unicast addresses all begin with same prefix: 2000::/3
        • Anycast
          • Anycast addresses identify groups of interfaces
          • Packets for anycast addresses are sent to nearest interface in a group
          • Facilitates communication between any sender and nearest group of receivers in a network
          • Allocated from unicast address space (2600::), not distinguishable from unicast address
        • Multicast (ff00::)
          • Identifies a group of interfaces, belonging to different nodes
            • Packages sent to multicast addresses are delivered to all interfaces in the group
            • Facilitate communication between single sender and multiple receivers
            • Multicast replaces broadcast addresses in iPv4
            • Prefix: ff00::/8
            • Format:
              • Indicator: Always 11111111 (aka FF), indicates multicast
              • Scope: indicates how broadly multicast packets will spread
                • 4 possible values:
                  • Node-local
                  • Link-local
                  • Site-local
                  • Global
                • Group ID: multicast group within the given scope
                  • All nodes, all-routers, OSPF, NTP
                • Special iPv6 Addresses
                  • Unspecified (::/128)
                    • All zeros, refers to host when host doesn’t know own address
                    • Used for devices seeking to have iPv6 address assigned
                  • Loopback (::1/128)
                    • Has single address for loopback function
                  • IPv4 Mapped (::ffff:0:0/96)
                    • Prefix is 96 bits, 32 bits hold the embedded iPv4 addresses
                    • Used to represent iPv4 address as an iPv6 address
                    • Address helps to transition from iPv4 to iPv6
                  • Unique Local Unicast (ULA) (fc00::/7)
                    • For local use, within a site or group of sites
                    • Not routable on the global internet
                  • Link-Local Unicast (fe80::/10)
                    • Unicast addresses to be used on a single link
                    • Used for neighbor discovery, automatic address configuration, when no routers are present


Introduction to Networks

Networks

    • How can 2 computers talk to each other? 
      • through network
      • most people buy a wireless router to connect  things together
  • LAN = Local Area Network
      • combination of router, computer systems, wireless router
  • NIC = Network Interface Card
      • ear and mouth of a computer: receive and transmit information
  • WAN = Wide Area Network
      • connect networks across multiple cities, countries, etc;
      • to connect network in buildings and different floors (creating a small WAN): 
        • connect all systems on a floor with a router
        • connect all floors in a building with another router
  • Mac Address
      • how computers identify or communicate with each other
      • unique to each computer’s network interface card
      • format: 00:00:AB:13:5A:2C, or 0000.AB13.5A2C
        • represented in hexadecimals
        • 6 bytes long, 48 bits
    • Computer’s Communicating
      • computers share a medium
  • Collision Detection/Avoidance
    • originally: A talks to B, while B is talking to A, then there is interference and A’s message to B is lost
    • now: before C sends data to A, sees if there is a conversation going on with A, and only sends when A is free

How the Internet Works

In order to learn more about Internet Protocol and networks for more work this summer, I have been doing some research and learning around how the Internet Works. I came across this amazing video that explains in very clear terms how the internet works and I thought it was really interesting, so I took some notes and decided to share it here:

How the Internet Works

    • internet = wire
      • can be underground or satellite
    • servers are special computers connected directly to internet
      • servers can communicate with other servers connected to internet
      • webpages are files on server’s hard drive wire
    • every server has a unique internet protocol address/IP address
      • help computers find each other 
      • IP addresses given domain names to make it more easy to remember/access
        • 172.217.5.110 -> google.com
    • computer is not a server because it is not connected directly to the internet (called a client)
      • connected indirectly to internet with internet service provider (ISP)
  • client connects with ISP with DSL = Digital Subscriber Line
  • aol.com is a server and a ISP 
  • sending an email to someone using aol.com:
    • from computer client > connect to ISP with DSL > connect to gmail.com > once sent > gmail.com sends it to [email protected] > next day someone can dial into aol.com and view it
  • when email/picture/webpage travels through internet, computer breaks down information into packets, and packets are reassembled on the receiving end
  • IP address and routers 
    • prevents what happens on your computer to appear on others computers
    • anywhere 2 or more of the internet intersects, a router directs your packets around the internet
    • every time you visit a website, there can be up to 10-15 routers helping you reach it
      • packet you send is like a candy wrapped in different layers
      • 1st layer: your computer’s IP address > your computer sends packet to router which adds its own IP address > each time packet sent to a new router a new layer of IP address is added until it reaches the server
      • when server sends back information, creates packets with identical wrapping > as packets make it back to your computer, each router unwraps a layer so it knows what IP address to send the packet to next to reach the right destination

The video: https://www.youtube.com/watch?v=7_LPdttKXPc


python -m to run module

I just learned that to run a python module from the terminal, the command line is:  python -m <name_of_module>

I needed to learn this command because while I was grading for my python course, I had to run the module through an outside terminal because I had just reinstalled Anaconda-Navigator and Spyder and the graph that is supposed to be plot after running the module was not showing up because it was hidden, so I ran it on terminal to make sure it wasn’t the student’s code that broke.  Beforehand we always ran the modules with run -m <name_of_module> but when I tried those commands in the Mac terminal it didn’t work. I also was confused what -m meant before, but now I understand it means to run a python module!

Ted Talk – 5 Second Rule

I like to watch Ted Talks on my free time or when I’m passing time (like eating, washing dishes, doing chores, etc;) because it makes me feel like my time isn’t wasted and that I’m learning. I like to go to sleep everyday knowing that I have at least improved myself and my life in some way–whether it be socially where I’ve built stronger relationships or caught up with people, academically where I’ve completed assignments or psets, hobbies-wise where I’ve improved either in motor skills such as dance or skateboarding, creation-wise where I was able to make, edit, or produce something, knowledge where I’ve learned things that I can apply to my life. Recently, since my school has ended, the academic aspect has escaped me so I have “free time” but I am still often dissatisfied because I spend a lot of it in idleness and not really improving myself. Sometimes I feel like having too many things I want to do limit me and make me decide to do none or scatter myself too thinly between multiple goals, whereas if I just focused on one thing I could complete it and get really good at it. So, in an attempt to try to go to sleep feeling more satisfied with myself and my self-growth, I listened to a few Ted Talks while washing the dishes today.

One that I really liked was called “How to stop screwing yourself over.” The speaker was a woman who is basically a “life coach” for people to “get anything they want in life” which could be to lose weight, to make 3x the amount of money they currently are, to buy a house, to find romance. At first, the occupation “life coach” sounds like farce so I wasn’t too interested, but I really enjoyed her TedTalk. I’ve linked it here: https://www.youtube.com/watch?v=Lp7E973zozc

One thing she taught that really resonated with me was called the “5 second rule.” She said that if you have an impulse to do something such as to change your lifestyle or pursue a goal, then you must marry it with action within 5 seconds, or else your brain kills the idea. Depending on the what the thought is, the action doesn’t have to be huge–it could be simply writing a note, sending an email. The thought could be as small as going up to volunteer for something on stage or bigger like learning a new skill or huge like starting a life in a new country. I thought about the countless times I’ve tried to do things, but haven’t ever “gotten to it” because right after I had the impulse to do something, I feel extremely motivated and pumped, and then when I don’t act on it, it never gets done.

So, after listening to her speech, I responded to all my emails (that I haven’t in a while), finished my logo for CPEG, did some iMovie editing on the coding youtube video I wanted to post, and more largely started an eBay account and posted my first item. Making an eBay account is something I’ve wanted to do for a really long time. Even though I had this spur of inspiration and motivation, I wasn’t sure how long it would last, so I am really hoping I can keep aiming for my goals.

MySQL Basic Commands

Install MariaDB: sudo apt install mariadb-server

Connect to MariaDB: sudo mysql

Show databases available: show databases;

Select ‘mysql’ database: use mysql;

Show tables in a database: show tables;

Retrieve everything: SELECT * FROM user;

Retrieve only some columns: SELECT host, user, password FROM user;

Creating table (named ‘user_review’): 
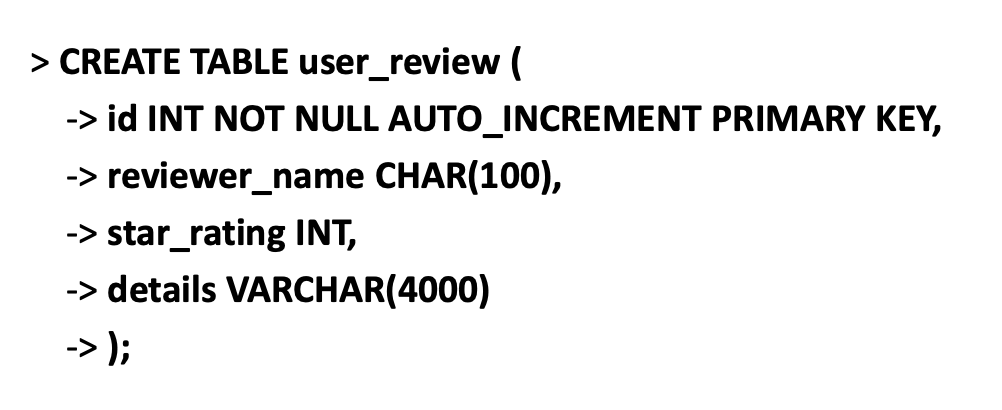
Inserting into a table:

INSERT INTO user_review (reviewer_name, star_rating, details) VALUE (‘Chris’, ‘4’, ‘A little bitter.’);

INSERT INTO user_review (reviewer_name, star_rating, details) VALUE (‘Linda’, ‘5’, ‘Essential for living.’);

List all rows and columns of a table: DESCRIBE user_review;


Flexbox Tool and Flexbox Froggy for CSS

Hi guys! Currently working on renovating my website (which you can check out here: jessicapeng.com), so I decided to share an extremely useful tool I am using for CSS and formatting things on the website: https://css-tricks.com/snippets/css/a-guide-to-flexbox/

I especially like this website because it formats the properties you use for the parent of the flex container on the left and the properties for children (inside the parent containers) on the right so you don’t have to frantically scroll through lots of syntax and information to find the distinctions and syntax. It looks like this:

One of the really useful tools I found was the magic of warp! I didn’t know flex had the property where they could not only help you align everything in 1 row, but they actually allow images to warp one-by-one to the bottom if there’s not enough space. This is so incredibly convenient because I no longer to hard-code the responsiveness of each element and redesign at each px size of the website. Flex does this for me!

This was the css of outside container or div that contained the images I wanted to align:

.container 

{

          display: flex;

           align-items: center;

           justify-content: center;

}

This allowed all the images in my container  to be aligned in a row, and centered all the elements inside the container (vertically and horizontally I believe).

Another really useful tool to learn flexbox froggy that has a 24 exercises to do with aligning frogs on lilypads that help you practice the syntax and functions of flex. Before I really start web development again, I might have to redo those exercises. Link to flexbox froggy: https://flexboxfroggy.com/ 

What it looks like:

File Permissions and ‘chmod’

Since I work with Linux in both Advanced Programming (C) and in my DevTech course, I had to implement file permissions and ‘chmod’ my shell scripts. I was always a little confused on this, but I was finally able to understand how the permissions are displayed and how to change and why we need to chmod a shell script, so below is an explanation of this:

When you type the commands ls -l into terminal you can see all the files or directories in the directory you are in and you can see all the file permissions for each. An example of ls -l looks like this:

The format of the file permissions look like:

_ _ _ _ _ _ _ _ _ _

which is 10 fields which are known as its “file mode bits” which give the different permissions. 

You can also look at it like:

_    _ _ _    _ _ _   _ _ _ 

The first character stands for whether it is a directory or not. If it is a directory, it has a ‘d’ as the 1st character. If it is just a file or not a directory, it will just have a dash: ‘-‘.

The next parameters are grouped into groups of 3. The 1st group stands for the user permissions, the second group of stands for the group permissions, and the third group stands for other permissions

The 3 permissions are:

read – r

write – w

execute – x

(Pretty self-explanatory right?) 

So another way to view the file mode bits are:

d   usr:r w x   grp:r w x   othr:r w x 

Given that, lets now analyze the ls -l of my previous directory I showed in the image above: 

As you can see, the only row that has a ‘d’ as the first mode bit is my directory lecture-5 which is a separate “folder” that contains the lecture notes inside my current hw-5 directory (lecture-5 is also shown in purple to indicate it is a directory).

Now, lets look at 1 file’s permissions just to apply what we learned above: script.sh

The file permissions for script.sh are:

-rwxr–r–

Let’s put this into the format above as:

direc:–    usr:rwx   grp: r–   othr:r–

  1. Directory: Since directory bit mode is a dash, this means it is not a directory.
  2. User permissions: User has permissions to read, write, and execute.
  3. Group permissions: Group only has permission to read (the rest are indicated by dashes).
  4. Other permissions: Same as group, Other only has permission to read (the rest are indicated by dashes).

Now that we understand how to see the permissions on file, we’ll talk about how to change permissions with chmod.

Chmod Modifies File Permissions

First, we must understand read, write, and execute can be represented by these numbers:

read – 4

write – 2

execute – 1

The format of ‘chmod’ is 3 digits. For example, if I wanted to give file permissions to a script called script.sh, I could do:

chmod 744 script.sh

Now, let’s go over what permissions that gives. The format of the digits are:

usr      grp      othr

The summation of the read, write, and execute numbers are the permissions given to each of the 3 groups. So, given the digits 744, this means that:

  1. usr = 7 = 4 + 2 + 1  -> which is all the permissions ( read, write, execute)
  2. grp = 4 -> 4 is just the read permission
  3. othr = 4 -> 4 is just the read permission

**Note: the sum of the numbers 4, 2, 1 are unique and cannot be produced by other combinations and therefore can serve to indicate file permissions

So chmod 744 script.sh would give us the exact same permissions that we just observed on script.sh:

-rwxr–r–

Where the user has all permissions ( read, write, execute), and the group and other both only have read permissions.

Here are the other combinations you can have:

# Permission rwx Binary
7 read, write and execute rwx 111
6 read and write rw- 110
5 read and execute r-x 101
4 read only r– 100
3 write and execute -wx 011
2 write only -w- 010
1 execute only –x 001
0 none 000