To connect to a network printer, follow these instructions. (Windows first. Scroll down for Mac)
Connecting to a Network printer on a Windows machine (Windows 7 and 8).
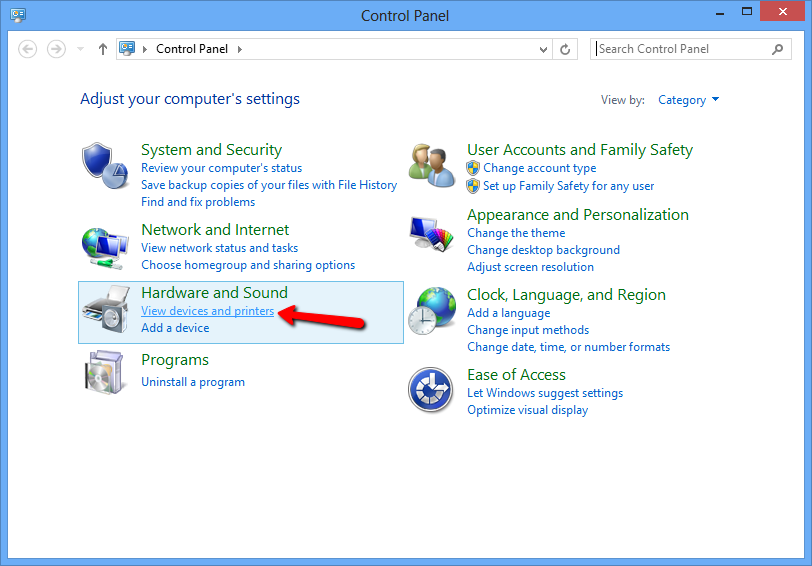
- Open your devices and printer window. Go to your control panel, then click ‘View Devices and Printers’
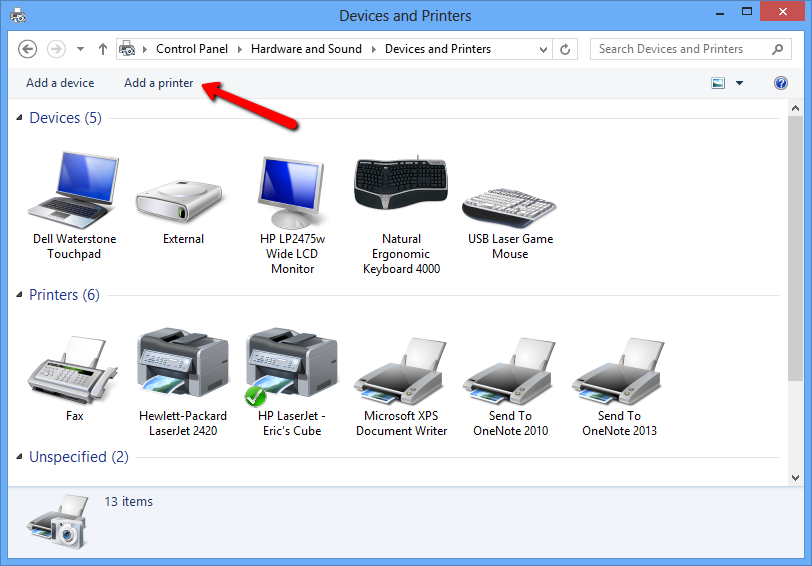
- Click ‘Add a Printer’ at the top
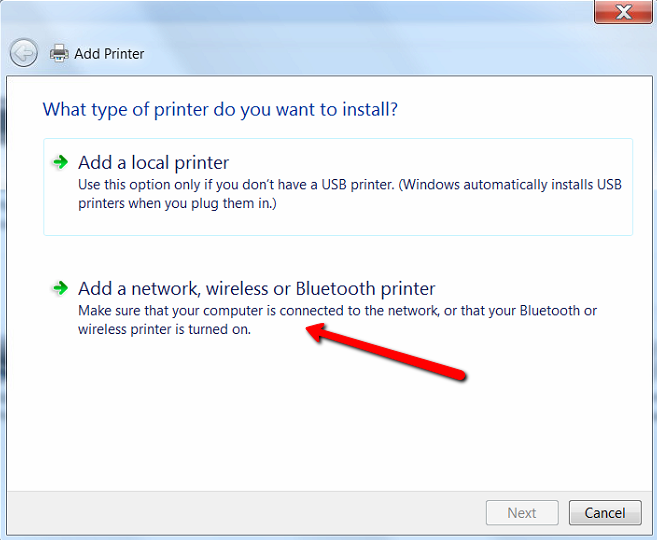
- You may have to choose “Network, Wireless, or bluetooth” option
- If you find the printer, go ahead and select it. I recommend that instead of wading through hundreds of possible printers, instead click “The printer I want isn’t listed”

- Add the printer using the TCP/IP option
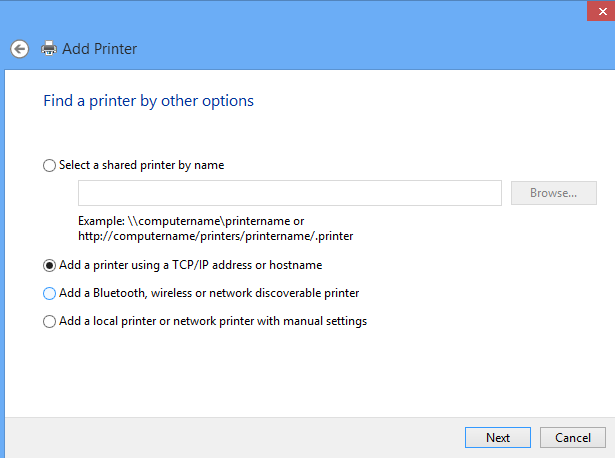
- Enter the IP address given to you. If you don’t know the IP address of the printer, please contact me to get the address. Check the “Query the printer” box, this may prevent you from searching for the driver manually.

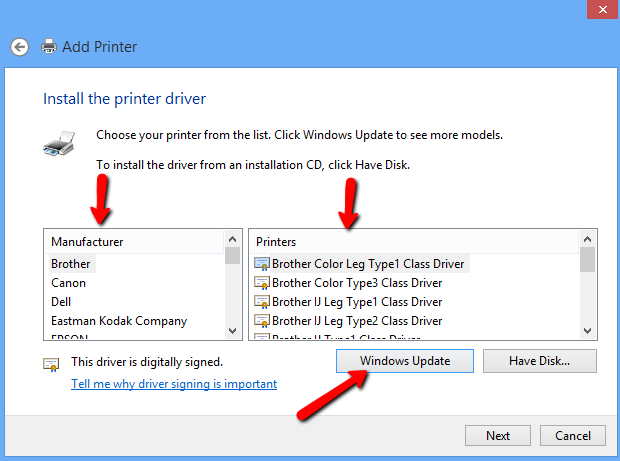
- If the query to automatically select the driver did NOT work, you will have to find it manually. Select the Manufacturer on the left, and the exact model on the right. If you do NOT see the printer, click the Windows Update button to download the latest version of all printers, wait a couple minutes, and search again. If you STILL do not see your printer model, please contact me for additional help.
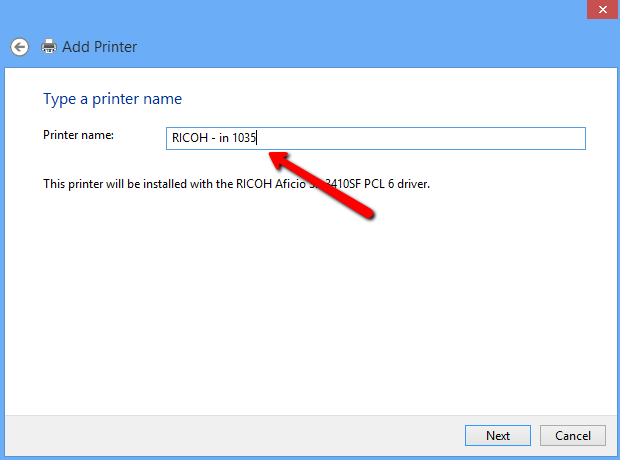
- Change the default name to something easier to remember. I highly recommend including the ROOM NUMBER the printer is in!
- This step is optional, you can set as the default, and print a test page to make sure it’s working.

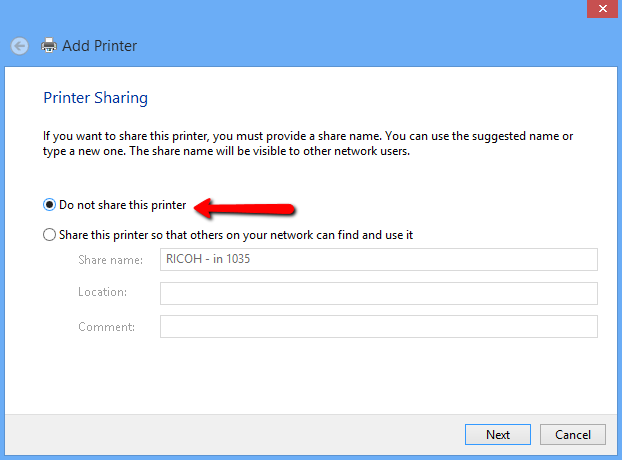
- Important: Do NOT enable printer sharing! This will only clog the network, and is not helpful since the printer is always online anyway.
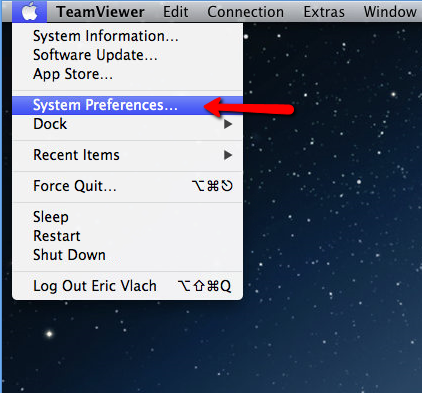
Connecting to a Network printer on a Mac.
- Click on the apple in the top left, then system preferences
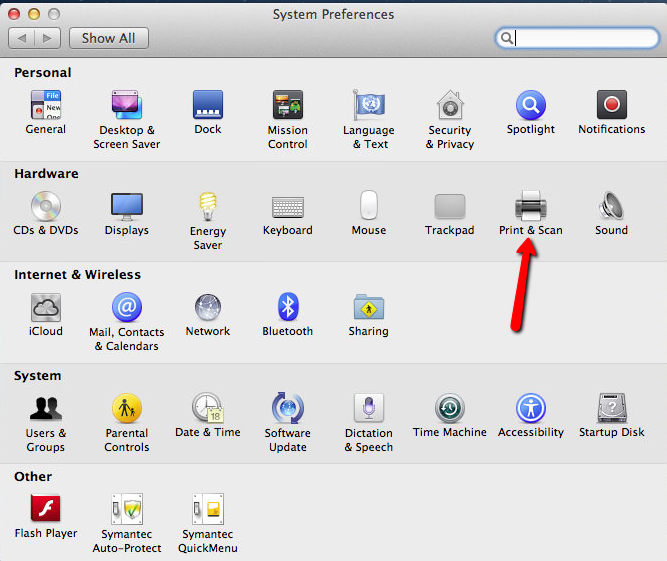
- Choose the print & scan icon
- Click the plus + icon under the list of printers on the left, then select “Add a printer or scanner.”
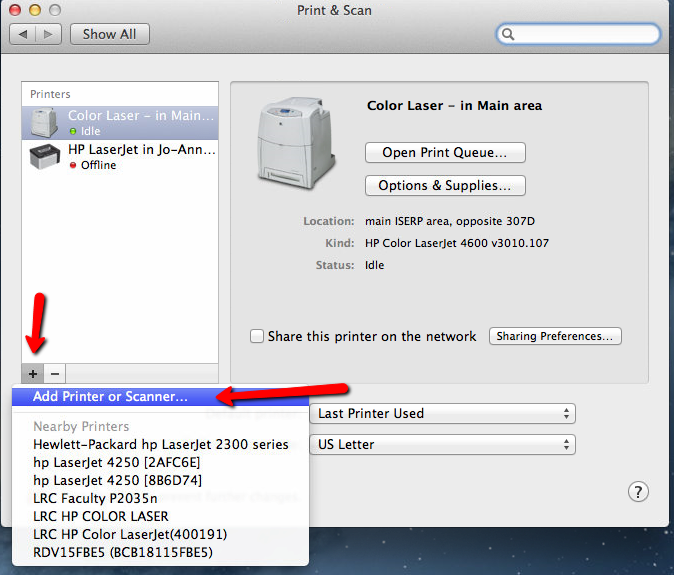
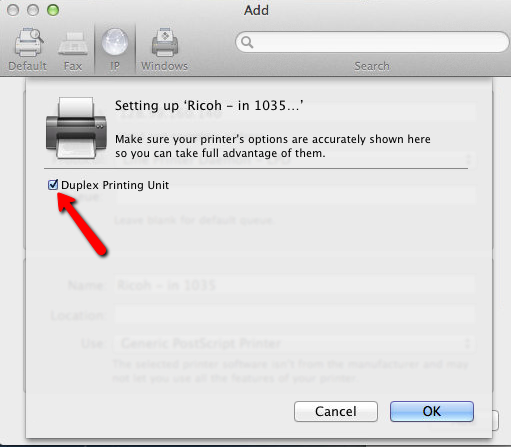
- Click the ‘IP’ tab in the top, then enter the IP address in the address line. I highly recommend changing the name of the printer to something easier to remember, including the room number! If you don’t know the IP address of the printer, please contact me to get the exact address.

- If you know that the unit has a duplexer (for double sided printing) you can check the box labeled “duplex printing unit.”